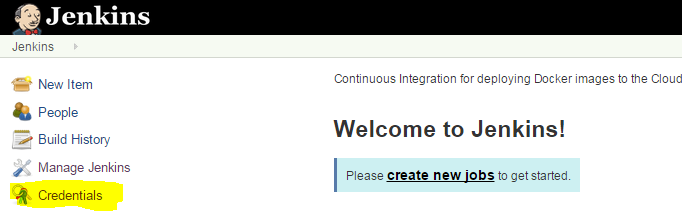
Tuesday, March 10, 2015

Setting up a Continuous Integration Environment with Jenkins and Docker PART 5, Using your Docker Registry

In this the fifth part of my tutorial on setting up a private Docker Registry, I will discuss how to use the registry.  

Publishing 

On the client server, create a small empty image to push to the new registry.


> docker run -t -i centos /bin/bash
Unable to find image 'centos' locally
Pulling repository centos
8efe422e6104: Download complete
511136ea3c5a: Download complete
5b12ef8fd570: Download complete

Status: Downloaded newer image for centos:latest

After it finishes downloading you'll be at a Docker prompt. Lets make a quick change to the filesystem: 

[root@4b1b63dfe9e6 /]# touch /tmp/junk

Exit out of the Docker container.

[root@4b1b63dfe9e6 /]# exit


The command docker images command has three crucial pieces of information.

  • What repository they came from.
  • The tags for each image.
  • The image ID of each image.
Lets look for my image 4b1b63dfe9e6. 
> docker images
docker images
REPOSITORY     TAG      IMAGE ID        CREATED             VIRTUAL SIZE
centos         7        8efe422e6104    3 weeks ago         224 MB
centos         centos7  8efe422e6104    3 weeks ago         224 MB

centos         latest   8efe422e6104    3 weeks ago         224 MB


It won't be listed because I still need to commit the change. 
Lets look for my latest created container ( ps -lq ).

>  docker ps -lq
4b1b63dfe9e6

Good I didn't lose it.

Commit the change: 

> docker commit 4b1b63dfe9e6 my-test-image
eb2889afbbaff0e9d20760fd49be14a73e386709c69a20c6f34ed4b07fa3acdf

Lets run the docker images command again:

> docker images
REPOSITORY      TAG      IMAGE ID      CREATED             VIRTUAL SIZE
my-test-image   latest   eb2889afbbaf  30 seconds ago      224 MB
centos          centos7  8efe422e6104  3 weeks ago         224 MB
centos          latest   8efe422e6104  3 weeks ago         224 MB

centos          7        8efe422e6104  3 weeks ago         224 MB

Ah there it is. However this image only exists locally, let's push it to the new registry.
First, log in to the registry with Docker. 

> docker login https://myserver.com:8080
Username (pete):
Login Succeeded

To use our local registry and find our image again we have to tag the image with the private registry's location in order to push to it. 

> docker tag my-test-image myserver.com:8080/my-test-image

Note that you are using the local name of the image first, then the tag you want to add to it. The tag is not using https://, just the domain, port and image name. 

Now we can push that image to our registry. This time using the tag name only:

> docker push myserver.com:8080/my-test-image
The push refers to a repository [myserver.com:8080/my-test-image](len: 1)
Sending image list
Pushing repository myserver.com:8080/my-test-image (1 tags)
511136ea3c5a: Pushing 1.536 kB/1.536 kB
2015/01/26 15:34:05 

Pulling from the Docker Registry.

It appears that we successfully pushed our test image up to the Docker Registry.  Lets log in as a different user, then connect to the Docker Registry as that new user.

> docker login https://myserver.com:8080
Username (jsmith):
Login Succeeded

> docker images

REPOSITORY        TAG         IMAGE ID       CREATED       VIRTUAL SIZE
my-test-image     latest      eb2889afbbaf   3 days ago     224 MB
myserver.com:8080/my-test-image   latest     eb2889afbbaf   3 days ago          224 MB
centos           7            8efe422e6104  3 weeks ago     224 MB
centos           centos7      8efe422e6104  3 weeks ago     224 MB
centos           latest       8efe422e6104  3 weeks ago     224 MB


Friday, January 16, 2015

Setting up a Continuous Integration Environment with Jenkins and Docker PART 4 Private Docker Registry

In Part 4 of this series I will be walking through the steps that were needed to set up my own Private Docker Registry on a CentOS 6 Linux server.

Step 1) Install Prerequisites  
The Docker registry is written in python, thus we need to install python development utilities and some libraries.
> yum install python-pip phython-devel libevent libevent-devel pyliblzma jjpython-gunicorn
...lots of output ...
Is this ok [y/N]: y

=== may not be needed
yum install mod_wsgi.x86_64
yum install  python-wsgiproxy.noarch
yum install python-moksha-wsgi.noarch python-wsgi-jsonrpc.noarch
====


Step 2) Install and Configure Docker Registry
>pip install docker-registry
...lots of output ...
Cleaning up...

By default Docker saves its data under the /tmp directory.  I will create a permanent location, then will need to configure Docker to to use the new location.


> mkdir /var/docker-registry

Locate the file config_sample.yml. On my system it is located in /usr/lib/python2.6/site-packages/config. Now copy the file to config.yml


> cd /usr/lib/python2.6/site-packages/config
> cp config_sample.yml config.yml
Edit config.yml, then replace any reference to /tmp with /var/docker-registry

Change this:

 sqlalchemy_index_database: _env:SQLALCHEMY_INDEX_DATABASE:sqlite:////tmp/docker-registry.db

To this:

 sqlalchemy_index_database: _env:SQLALCHEMY_INDEX_DATABASE:sqlite:////var/docker-registry/docker-registry.db

Change this:
local: &local
    <<: *common
    storage: local

    storage_path: _env:STORAGE_PATH:/tmp/registry

To this:

local: &local
    <<: *common
    storage: local

    storage_path: _env:STORAGE_PATH:/var/docker-registry/registry

Change this:

glance: &glance
    <<: *common
    storage: glance
    storage_alternate: _env:GLANCE_STORAGE_ALTERNATE:file

    storage_path: _env:STORAGE_PATH:/tmp/registry

To this:

glance: &glance
    <<: *common
    storage: glance
    storage_alternate: _env:GLANCE_STORAGE_ALTERNATE:file

    storage_path: _env:STORAGE_PATH:/var/docker-registry/registry


If you want to do something more complex like using AWS S3 buckets, Google Cloud Storage, or Openstack you can configure it in this file.

Now that the config is in place let's try to start the server.

> gunicorn --access-logfile - --debug -k gevent -b 0.0.0.0:5000 -w 1 docker_registry.wsgi:application
07/Jan/2015:16:52:32 +0000 WARNING: Cache storage disabled!
07/Jan/2015:16:52:32 +0000 WARNING: LRU cache disabled!
07/Jan/2015:16:52:32 +0000 DEBUG: Will return docker-registry.drivers.file.Storage

Your output should be similar.
Go ahead and hit CTRL-C to kill the process.

STEP 3) Docker Registry as a Service on start up

First check to see if the Docker Registry is configured as a service
> chkconfig --list | grep docker
docker-registry 0:off   1:off   2:on    3:on    4:on    5:on    6:off

Next start the Docker Registry.  I use restart here just so you can see the output.

> service docker-registry restart
Stopping docker-registry: [FAILED]
Starting docker-registry: OK

Awesome! it looks like it is up and running, lets verify that docker-registry is up.

> ps -ef | grep docker
root      5445     1  0 Jan07 pts/0    00:00:00 /usr/bin/python /usr/bin/gunicorn --access-logfile - --debug --max-requests 100 --graceful-timeout 3600 -t 3600 -k gevent -b 0.0.0.0:5000 -w 4 docker_registry.wsgi:application
root      5451  5445  0 Jan07 pts/0    00:00:23 /usr/bin/python /usr/bin/gunicorn --access-logfile - --debug --max-requests 100 --graceful-timeout 3600 -t 3600 -k gevent -b 0.0.0.0:5000 -w 4 docker_registry.wsgi:application
root      5452  5445  0 Jan07 pts/0    00:00:25 /usr/bin/python /usr/bin/gunicorn --access-logfile - --debug --max-requests 100 --graceful-timeout 3600 -t 3600 -k gevent -b 0.0.0.0:5000 -w 4 docker_registry.wsgi:application
root      5455  5445  0 Jan07 pts/0    00:00:25 /usr/bin/python /usr/bin/gunicorn --access-logfile - --debug --max-requests 100 --graceful-timeout 3600 -t 3600 -k gevent -b 0.0.0.0:5000 -w 4 docker_registry.wsgi:application
root      5458  5445  0 Jan07 pts/0    00:00:25 /usr/bin/python /usr/bin/gunicorn --access-logfile - --debug --max-requests 100 --graceful-timeout 3600 -t 3600 -k gevent -b 0.0.0.0:5000 -w 4 docker_registry.wsgi:application
root      6211 20583  0 13:46 pts/0    00:00:00 grep docker


STEP 4) Adding Authentication

Borrowing heavily from the References linked to at the bottom of this post I will be implementing Nginx (pronounced Engine X) as a front end for access to the Docker Registry. By default the Docker Registry listens on port 5000. In many labs and environments port 5000 is not available through internal firewalls and certainly not on the open internet. Thus we need a method for forwarding the requests to Docker.  Nginx is a fairly new opensource web server for http, https and other protocols, it can be used as a load balancer and reverse proxy server.  It has features that allow it to handle a higher volume of requests than Apache, by handling requests differently. There are many discussions and blog posts on the web about Nginx vs Apache. I recommend reading a couple. 

Lets verify that htpasswd is installed, this is an Apache tool that can be used to generate encrypted passwords.
> yum provides \*bin/htpasswd
Loaded plugins: fastestmirror
...
httpd-tools-2.2.15-39.el6.centos.x86_64 : Tools for use with the Apache HTTP Server
Repo        : base
Matched from:
Filename    : /usr/bin/htpasswd
...

Now we know what httpd package has htpasswd lets try to install it. 
> yum install httpd-tools
Loaded plugins: fastestmirror
Setting up Install Process
Loading mirror speeds from cached hostfile
 * base: mirror.zetup.net
 * epel: mirror.proserve.nl
 * extras: mirror.zetup.net
 * updates: ftp.plusline.de
Package httpd-tools-2.2.15-39.el6.centos.x86_64 already installed and latest version
Nothing to do

It has already been installed, if it wasn't installed this would have installed it.
Install Nginx


yum install nginx
...lots of output...
Is this ok [y/N]:y

Create a Docker user, create a password for the user when prompted.
After this step we will have a password file with our users, and a Docker registry available.


> htpasswd -c /etc/nginx/docker-registry.htpasswd pete
New password:
Re-type new password:
Adding password for user pete
To add additional users, rerun the above command without the -c flag. The -c flag creates the password file. If you reuse -c you will overwrite the file.


Next I need to tell Nginx to use the created authentication file, and forward requests to the Docker registry. 
Create the file: /etc/nginx/conf.d/docker-registry.conf
then add the following content, and edit as appropriate for your environment.


# For versions of Nginx > 1.3.9 that include chunked transfer encoding support
# Replace with appropriate values where necessary

upstream docker-registry {
 server localhost:5000;
}

server {
 listen 8080;
 server_name my.docker.registry.com;

 # ssl on;
 # ssl_certificate /etc/nginx/ssl/<servername>.crt;
 # ssl_certificate_key /etc/nginx/ssl/<servername>.key;

 proxy_set_header Host       $http_host;   # required for Docker client sake
 proxy_set_header X-Real-IP  $remote_addr; # pass on real client IP

 client_max_body_size 0; # disable any limits to avoid HTTP 413 for large image uploads

 # required to avoid HTTP 411: see Issue #1486 (https://github.com/dotcloud/docker/issues/1486)
 chunked_transfer_encoding on;

 location / {
     # let Nginx know about our auth file
     auth_basic              "Restricted";
     auth_basic_user_file    docker-registry.htpasswd;

     proxy_pass http://docker-registry;
 }
 location /_ping {
     auth_basic off;
     proxy_pass http://docker-registry;
 }  
 location /v1/_ping {
     auth_basic off;
     proxy_pass http://docker-registry;
 }

}

Restart Nginx to activate the virtual host, and test the connections to Docker and Nginx
> service nginx restart
Stopping nginx:                                            [  OK  ]
Starting nginx:                                            [  OK  ]

>curl localhost:5000
true

>curl localhost:8080
<html>
<head><title>401 Authorization Required</title></head>
<body bgcolor="white">
<center><h1>401 Authorization Required</h1></center>
<hr><center>nginx/1.0.15</center>
</body>
</html>

Great, Docker is running, and Nginx is forwarding the request to Docker.
Now lets try connecting to Docker with the username created earlier.
>curl pete:mypassword@localhost:8080
true


STEP 5) Adding Secure Authentication (SSL)
In the previous step we added basic http authentication, however this is not very secure since connections to the registry are unencrypted.  In this step I'll show you how to enable SSL (https), and setup a self signed certificate.

Lets begin by editing the file: /etc/nginx/conf.d/docker-registry.conf 
Remove the # symbol in front of the SSL lines.  The result should look like this;
  ssl on;
  ssl_certificate /etc/nginx/ssl/<servername>.crt;
  ssl_certificate_key /etc/nginx/ssl/<servername>.key;

Save the file. Nginx is now configured to use SSL and will look for the certificate and key at the name and location listed in the file. Please note: As far I know there are no standards for the location of your certificate I chose the above paths for convenience .

Make sure you are logged into the server for which you want to create the SSL Certificate then enter the following, making sure to replace <servername> with the fully qualified domain name of your system.
The first thing I need to do is create the key and certificate request.
 
> cd /etc/httpd/conf
> openssl req -new -newkey rsa:2048 -nodes -keyout <servername>.key -out <servername>.csr

Next answer the questions The purpose of the questions is to add randomization in the certificate. Answer the questions with values suitable to your environment. Press Enter to leave the field blank, or to select the default. In my experience the last three questions can be left blank. Make sure that "Common Name", (the Fully Qualified Domain Name) matches the hostname you will use to connect to Docker.

 
Generating a 2048 bit RSA private key
.........+++
......................................................................................................................................+++
writing new private key to 'myservername.key'
-----
You are about to be asked to enter information that will be incorporated
into your certificate request.
What you are about to enter is what is called a Distinguished Name or a DN.
There are quite a few fields but you can leave some blank
For some fields there will be a default value,
If you enter '.', the field will be left blank.
-----

Country Name (2 letter code) [GB]:US
State or Province Name (full name) [Berkshire]:MASSACHUSETTS
Locality Name (eg, city) [Newbury]:BOSTON
Organization Name (eg, company) [My Company Ltd]:
Organizational Unit Name (eg, section) []:IT
Common Name (eg, your name or your server's hostname) []: <servername>
Email Address []:
Please enter the following 'extra' attributes to be sent with your
certificate request
A challenge password []:
An optional company name []:

Next Create the following directory, then copy the private key and the Certificate Request to it.
 
> mkdir /etc/nginx/ssl
> cp <servername>.key /etc/nginx/ssl
> cp <servername>.csr /etc/nginx/ssl
Creating a self-signed certificate
If you do not plan to have the certificate signed by a Certificate Authority (CA) or if you plan to test the new SSL implementation while the CA is signing your certificate, you can generate a self-signed certificate. This temporary certificate generates errors in the client browser to the effect that the signing certificate authority is unknown and not trusted.
To generate a temporary certificate that is good for 365 days  Issue the following commands:

 
> cd /etc/nginx/ssl
> openssl x509 -req -days 365 -in <servername>.csr -signkey <servername>.key -out <servername>.crt


SSL Test

Restart Nginx to reload the configuration and SSL Keys, if all goes well there should not be any errors.
 
> service nginx restart
Stopping nginx: OK
Starting nginx: OK
Lets try a couple of different curl commands.
 
> cd /etc/nginx/ssl
> curl pete:mypassword@localhost:8080    
...
400 Bad Request
...
# You can see that Nginx is forwarding us to https, but I'm getting a 400 Bad Request.
# Lets try specifying https 

>curl  https://pete:mypassword@localhost:8080

curl: (60) Peer certificate cannot be authenticated with known CA certificates
More details here: http://curl.haxx.se/docs/sslcerts.html

curl performs SSL certificate verification by default, using a "bundle"
 of Certificate Authority (CA) public keys (CA certs). If the default
 bundle file isn't adequate, you can specify an alternate file
 using the --cacert option.
If this HTTPS server uses a certificate signed by a CA represented in
 the bundle, the certificate verification probably failed due to a
 problem with the certificate (it might be expired, or the name might
 not match the domain name in the URL).
If you'd like to turn off curl's verification of the certificate, use
 the -k (or --insecure) option.

#Curl is having trouble now because I have created a self signed certificate
#and the curl command doesn't trust the the cert, due to the certificate not
# being in curl's default trust store. Lets point directly to new certificate.

> curl --cacert myserver.crt https://pete:mypassword@localhost:8080
curl: (51) SSL: certificate subject name 'myserver' does not match target host name 'localhost'

#Curl still is having trouble because we tried to connect to localhost, but 
#created the certificate with the fully qualified domain name of the server.
#Lets try one more time.

> curl --cacert myserver.crt https://pete:mypassword@myserver:8080
true

#SUCCESS!!!


STEP 6) Accessing the Docker Registry from another server.

Specific to CentOS6 and possibly Redhat there is an application called docker that is a "docking application for KDE3, and GNOME2". This app will cause conflicts with docker-io. We have several tasks we must do on the client prior being able to login. 

  1. Remove the docker app if it is installed.
  2. Setup a server as a Docker client.
  3. Import the Docker Registry's self-signed certificate into the systems trust store.


Install Docker Client
> rpm -e docker 
> yum install docker-io 
...lots of output...
Is this ok [y/N]: y
Complete!

Once Docker is installed, you will need to start the docker daemon, then verify that docker is configured to start at boot.
> service docker start 
Starting cgconfig service:                                 [  OK  ]
Starting docker:                                           [  OK  ]
>chkconfig --list docker
docker          0:off   1:off   2:on    3:on    4:on    5:on    6:off
If we were to attempt to login now using the command below we would encounter several issues.  I will work through each issue I encountered hopefully this will save you time.
> docker login https://myserver
 username:
 password:
 email:
If your docker registry server is not yet part of your local DNS, add the servers ip address and fully qualified domain name (FQDN) into your client systems /etc/hosts file. On start up the Docker daemon creates a file /var/run/docker.sock. This file has the following ownership (root,docker) and permissions (644).
srw-rw---- 1 root docker 0 Jan 13 17:24 /var/run/docker.sock

When attempting to run the docker login command as a client user, an error similar to the following is returned.


dial unix /var/run/docker.sock: permission denied

A temporary fix is to reset the permissions to by executing the chmod command, however once you restart the docker daemon the permissions return to 644.


> chmod 666 /var/run/docker.sock
srw-rw-rw- 1 root docker 0 Jan 13 17:24 /var/run/docker.sock

A more permanent solution is to add your clients username to the docker group. First verify that you have a docker group by looking at the /etc/group file. To add the the docker group and add your client to the docker group, execute the following commands;
 
> groupadd docker
> useradd -aG docker username

After adding the client user to the docker group the user must log out then log back into their account, and the error should go away.

The next thing we need to do is add our self signed certificate to the client systems list of trusted certificates. The following solution is not ideal but it worked for me, I will update this post if I come across a better solution. You will need to go back to your Docker Registry server and copy the registry servers certificate to the client server.

On the registry server,


> cd /etc/nginx/ssl
> cat myserver.crt

-----BEGIN CERTIFICATE-----
MIIDfjCCAmYCCQCS024a3xtBXzANBgkqhkiG9w0BAQUFADCBgDELMAkGA1UEBhMC
VVMxFjAUBgNVBAgMDU1BU1NBQ0hVU0VUVFMxDzANBgNVBAcMBkJvc3RvbjESMBAG
A1UECgwJTWljcm9zb2Z0MQswCQYDVQQLDAJJVDEnMCUGA1UEAwweZG9ja2VyaHVi
LnVzLm1zdWRldi5ub2tsYWIubmV0MB4XDTE1MDExMjIwNDQyNloXDTE2MDExMjIw
NDQyNlowgYAxCzAJBgNMBAYTAlVTMRYwFAYDVQQIDA1NQVNTQUNIVVNFVFRTMQ8w
DQYDVQQHDAZCb3N0b24xEjAQBgNVBAoMCU1pY3Jvc29mdDELMAkGA1UECwwCSVQx
JzAlBgNVBAMMHmRvY2tlcmh1Yi51cy5tc3VkZXYubm9rbGFiLm5ldDCCASIwDQYJ
KoZIhvcNAQEBBQADggEPADCCAQoCggEBALHAu+zYTe9dMJL4sSz8ihTADKgwOUPh
Szj4JeDYKVMv/N3ihNdwoSVDoy1qldR+Zl86BRD2YHj4i2FUOhlBxyFDLEB+6bMi
lKHeh7V2dBpTraALJF4faKyVVRtwvhtvfxvRdP4sS3a2H44oYkWQsnV026TRRhnn
bI7AqkYuna8EcjFt1UrRBM3lzDxGwyX1iCyydU9xKS0mRsgtpZXbHS8NBD5mKDD2
breYiaSsdzhLdCxqGuzoULhWP9KJq++gAlahdo1OJjCdrbLYvkNAeVZsayEA8Yf7
4MEej5Ab5SNd3rkOlZDY9pi/W72EDqJpE1vEEiHcmuQshnZFxTADtdcCAwEAATAN
BgkqhkiG9w0BAQUFAAOCAQEABs+53+GMpOLIMVaKVxwHUIy2MIzIKE3j3x0W2oXt
N3kHi9gYvZoiClw/E+1VKj6ra59vnrptSumFy3gqBPPFa4r9hglb25ITDiIiXy9t
UAZWBq8YDdHkOCPfKFtc3P0b+eZ/HiQITfdle9SnNXwAVV9DmC1YTFlMUA3XvlRO
DPERTa4RWW1WXA/zkyGbMXRvdqRppOvQQ1uewl3HFk8ZCbbR8BqLbmfcoepn/KAs
MWaik/04ARab2sa/xC27ZswyG1VlLD/SjMK6Tu6b8bv72pYbEgDj/ekRWN15BdYA
-----END CERTIFICATE-----


Copy the output and paste it to a file on your client server such as /tmp/docker-registry.crt then add it to your systems certificate authority bundle, after making a backup copy of course.

 
> cd /etc/pki/tls/certs
> cp ca-bundle.crt ca-bundle.crt.bak
> cat /tmp/docker-registry.crt >> ca-bundle.crt
> service docker restart

Finally we are ready to attempt our login, if successful a file (.dockercfg) will be created in the end users home directory.


> docker login https://myserver.com:8080
Username: pete
Password:
Email: pete@mycompany.com
Login Succeeded

Lets see if we can run a simple docker command.

 
> docker info
Containers: 0
Images: 0
Storage Driver: devicemapper
 Pool Name: docker-253:0-918242-pool
 Pool Blocksize: 65.54 kB
 Data file: /var/lib/docker/devicemapper/devicemapper/data
 Metadata file: /var/lib/docker/devicemapper/devicemapper/metadata
 Data Space Used: 305.7 MB
 Data Space Total: 107.4 GB
 Metadata Space Used: 729.1 kB
 Metadata Space Total: 2.147 GB
 Library Version: 1.02.89-RHEL6 (2014-09-01)
Execution Driver: native-0.2
Kernel Version: 2.6.32-504.el6.x86_64
Operating System: 

At this point I have successfully installed python pre-requisites, docker-io, and Nginx. I have configured docker and Nginx as a reverse proxy to forward requests to docker, setup SSL and several users. Finally I was able to log in to the docker registry and run a simple docker command.  In Part 5 of this tutorial, I will begin using this docker registry. 


References:

How to set up a private docker registry on ubuntu

Monday, December 22, 2014

Setting up a Continuous Integration Environment with Jenkins and Docker PART 3 Jenkins Job Setup


In part three of my continuous integration project I'll be completing the Jenkins setup.  I will show how to create a new job, install plugins, and setup credentials to connect to the Git repository we created in Part 2. 

Lets return to the Jenkins server. We previously installed the Java run time environment but we didn't install the JDK development environment.  You can skip this step if your project is not a Java project. 

Step 1) Install the JDK we forgot when creating the Jenkins server> yum list available  | grep java-1.7
java-1.7.0-openjdk.x86_64          1:1.7.0.71-2.5.3.2.el6_6       updates
java-1.7.0-openjdk-demo.x86_64     1:1.7.0.71-2.5.3.2.el6_6       updates
java-1.7.0-openjdk-devel.x86_64    1:1.7.0.71-2.5.3.2.el6_6       updates
java-1.7.0-openjdk-javadoc.noarch  1:1.7.0.71-2.5.3.2.el6_6       updates
java-1.7.0-openjdk-src.x86_64      1:1.7.0.71-2.5.3.2.el6_6       updates

> yum install java-1.7.0-openjdk-devel.x86_64
... lots of output ...
Is this ok [y/N]: y

Step 2) Lets not forget git
> yum install git
... lots of output ...
Is this ok [y/N]: y

Step 3) Create the SSH key pair for the Jenkins user.
The yum install of Jenkins sets the Jenkins user shell to /bin/false, thus  is unable to su directly to the jenkins user. Running the following command will generated the ssh key pair for the Jenkins user.

> sudo -u jenkins ssh-keygen

Add the Git repository server to the knows_hosts file for the Jenkins user, answer yes to the question. 

> sudo -u jenkins ssh git@10.52.188.97
The authenticity of host '10.52.188.97 (10.52.188.97)' can't be established.
RSA key fingerprint is 7c:e6:3d:18:c1:0a:6e:f6:1d:7c:96:f4:f5:c3:da:a5.
Are you sure you want to continue connecting (yes/no)? yes
Warning: Permanently added '10.52.188.97' (RSA) to the list of known hosts.
Last login: Thu Dec 18 13:57:18 2014 from 25.16.76.152

Step 4) Add some plugins to Jenkins
First lets navigate to our Jenkins instance, then select;  
       manage Jenkins --> --> Manage Plugins --> Available Tab
Select the following Plugins.

  • Git Plugin
  • Git Client Plugin
  • Git Parameter Plugin
  • git-notes Plugin
  • git tag message Plugin
  • Green Balls "Changes Hudson/Jenkins to use green balls instead of blue for successful builds
Select Download now and install after restart


STEP 5) Setup Credentials.


Select Credentials


Select Add Credentials


Select Global Credentials


Select SSH Username with private key, then paste the Private key you created above into the Key field.


STEP 6) Jenkins Configure System
Return to Jenkins HOME then Select Manage Jenkins --> Configure System.

       a) Scroll down and add a JDK installation.
Give it a name, then set the JAVA_HOME location (/usr/lib/jvm/java1.7.0-openjdk.x86_64)


       b) Add a Maven installation.


       c) Add a Git Installation


Step 7) Create a Jenkins job
Since every project will be different I will leave it up to you to configure your Jenkins job to compile and package your app. I will be revisiting this in a future post when I create the Docker Image.


Monday, December 15, 2014

Setting up a Continuous Integration Environment with Jenkins and Docker PART 2 Git Repository

In part two of my continuous integration project I'll go over the steps required to setup a GIT server to host git repositories, as well as initial repository creation and importing the first project. In part 1 of this series I created 4 CENTOS 6.6 Linux servers, with one designated for the GIT repository server. There are two methods to connect to a GIT repository ssh and https, this project requires ssh so in this article we will discuss ssh. This is not a GIT tutorial there are plenty of good GIT tutorials elsewhere on the web. 

Step 1) Install Git

> yum install git
---> Running transaction check

---> Package git.x86_64 0:1.7.1-3.el6_4.1 will be installed

...lots of output...

Is this ok [y/N]: y

...lots of output...
Complete!

Step 2) Create a user and group named "git"

The groupadd command will create a new group, with the next available group id in the /etc/group file.  The useradd command will create the home directory for the git user, the default location is the /home directory. The repository can be anywhere that the git user has write privileges such as  /data, /opt or /usr/local/git depending on your personal preferences.


> groupadd git
> useradd –d /home/git –g git –s /bin/bash –c”Git Repo User” git
> passwd git
Password: <password>
Re-enter password: <password>

Step 3) Setup ssh access.

Git clients (your developers) will be connecting to this git server using ssh keys, we must create the authorized_keys file to hold the clients public keys. 

> su - git
> mkdir .ssh 
> chmod 700 .ssh
> touch .ssh/authorized_keys
> chmod 600 .ssh/authorized_keys

Step 4) Create an empty repository replacing <project> with the name of your project.

As the git user
> cd /opt/git
> mkdir <project>
> cd <project>
> git init --bare
 git init --bare

Initialized empty Git repository in /opt/git/project/

Step 4) Creating a private / public ssh key pair.

Before you can grant access to your GIT repository you will need to gather your developers public keys. Here are a couple of methods for creating a ssh key pair. It does not matter what method you use to generate your key pair as ssh keys are truly portable over all platforms.

LINUX:
> ssh-keygen -t rsa
   Generating public/private rsa key pair.
   Enter file in which to save the key (/home/pete/.ssh/id_rsa):
   Created directory '/home/pete/.ssh'.
   Enter passphrase (empty for no passphrase):
   Enter same passphrase again:
   Your identification has been saved in /home/pete/.ssh/id_rsa.
   Your public key has been saved in /home/pete/.ssh/id_rsa.pub.
   The key fingerprint is:
   8d:73:54:cb:ae:b6:96:e5:ff:c0:65:38:12:b8:42:d9 pete@myserver.lab.net


>  cat .ssh/id_rsa.pub
ssh-rsa AAAAB3NzaC1yc2EAAAABIwAAAQEAzng5JGKNLHFap6R5L6IOItG04WydGaxDIHM80AQNAdFVqjbU4QX4Z66UfmGR7l2Dit5ouoLWOMMrI3Qh0hXzsRooQLPYKbEtq/mWJvhcPCReURKFjiE+Po62AaGs9xHz/tl6D15/vOtFeOza4Z6ECkHgPGCJdmhXAib2/5IJgBMhop67TFwbDOc0JmMOB9y/1yIrd+nsmaYTy/OZVFNddFywB8XZ9JaCB/HVeGajzXdc8WdMKIODExHMzEcddHZq9sTt5pPEXRPmED0SMs0r+X9Kn+zTj0OPtQwWOyxxfCko7OnxBQL+kec8Ypl1xWVrqHImI8Xhs1UZdUsVCU6pww== pete@myserver.lab.net

Using Puttygen on windows:
Download puttygen from  here, generate your private/public key and save them, to C:\users\username\.ssh


Select Generate                                                 Save private/public keys.


Step 5) Enabling access to the repository

To use the new repository we need to add developer SSH public keys to the authorized_keys file located on the GIT repository server. It is as simple as appending each developers public key to the authorized_keys file. Your developers will need to send you your their public key. 

If your developers have emailed you their public key you can simply cut and past the text file into your authorized_keys file. Otherwise if you have saved them locally you can do something similar to the following.

> cd /home/git
> cat /tmp/id_rsa.pete.pub  >> .ssh/authorized_keys


Step 6) Connecting to the GIT repository, and importing your project.

There are many tools that can be used to connect to the GIT repository from a Windows client, including the plugins for Eclipse, TortoiseGit, cygwin, or the git bash command line. Many developers I've worked with have used the command line and the Eclipse IDE to develop their code.  For this tutorial I'll be using the git bash command line. Make sure you've installed a GIT client, and replace <GitServerIP> with the IP or domain name of your GIT server.

On the client system;
    The following steps assume that you actually have files or code or anything else you want already in your project directory on the client system.

Test your ssh connection to the GIT server, this will log the client into the GIT server. Obviously giving the client user access to a shell prompt on your GIT server is probably not a good idea.   Refer to this reference for how to restrict access. 
> ssh git@<GitServerIP>

The authenticity of host '10.11.12.13 (10.11.12.13)' can't be established.
RSA key fingerprint is 7c:e6:3d:18:c1:0a:6e:f6:1d:7c:96:f4:f5:c3:da:a5.
Are you sure you want to continue connecting (yes/no)? yes

Warning: Permanently added '10.11.12.13' (RSA) to the list of known hosts.
$ exit


> cd project
> git init
Initialized empty Git repository in /home/pete/project/.git
> git add .
> git commit -m 'First Commit'
> git remote add origin git@<GitServerIP>:/opt/git/project
> git push origin master
Counting objects: 49, done.
Delta compression using up to 4 threads.
Compressing objects: 100% (39/39), done.
Writing objects: 100% (49/49), 15.32 KiB | 0 bytes/s, done.
Total 49 (delta 1), reused 0 (delta 0)
To git@10.11.12.13:/opt/git/contacts
 * [new branch]      master -> master


Trouble Shooting:

Problem: You receive prompts for pass phrase or password,

Solution 1) Verify which ssh.exe you are using and that your id_rsa and id_rsa.pub files are located where that ssh.exe expects them. Especially if you are using cygwin.

Solution 2 ) Modify your git workspace .git/config file to point to the correct repository URL

The .git/config file is located in the project directory mentioned above for example; /home/pete/project/.git/config
          
           Manually: edit the file then look for the [remote "origin"] directive.
           Command Line: git remote set-url origin git@10.11.12.13:/opt/git/project

Solution 3) If you installed Tortoise Git
           By default Tortoise Git sets the system Environment variable GIT_SSH to something like this. C:\Program Files\TortoiseSVN\bin\TortoisePlink.exe. 
           
Reset/SET GIT_SSH system environment variable to:  

           C:\Program Files (x86)\Git\bin\ssh.exe

Windows7:  Control Panel -> System Properties -> Advanced -> Environment Variables

AND...

Open up Tortoise Git Settings -> Network
Remove  TortoisePlink.exe from the SSH CLient: setting
Some have had success just entering ssh.exe
Others have put the full path to: C:\Program Files (x86)\Git\bin\ssh.exe
Others have been successfull with the path to ssh.exe as installed by java.
            
Reboot/re-open a new git-bash window hopefully it worked. (this solution didn't work for me but did for other users)


Solution 4)Temporarily  Reset GIT_SSH in your shell
                  > export GIT_SSH="C:\Program Files (x86)\Git\bin\ssh.exe"

Solution 5) Permanently Reset GIT_SSH every time you open a shell.
                   Create a .bashrc file, and add the above export line
                  > cd ~
                  > vi .bashrc
                   export GIT_SSH="C:\Program Files (x86)\Git\bin\ssh.exe"
                 :wq
            

References:
   GIT Setting up the Server 

Wednesday, December 10, 2014

Setting up a Continuous Integration Environment with Jenkins and Docker PART 1.

As a proof of concept I was tasked with setting up a continuous integration environment using Jenkins, Docker, Maven, Artifactory, GIT, and a JDK 1.7 web application running on Tomcat. Additional requirements included using our own local Docker Hub and Docker Index. Final deployment will be to the cloud either AWS or Microsoft's Azure.

I began by creating four identical CENTOS Virtual Machines.  I probably didn't need 4 separate servers however I figured I would end up making mistakes and have to rebuild one or more of the servers during the project. Our lab environment has large servers runing VMware. I created the following four virtual servers.
  1. DockerJenkins
  2. DockerGIT
  3. DockerHub
  4. DockerArtifactory
I began by setting up the Jenkins Server.

Step 1) Add the Jenkins RPM repository to yum configuration, then install Jenkins

# wget -O /etc/yum.repos.d/jenkins.repo http://pkg.jenkins-ci.org/redhat/jenkins.repo
# rpm --import http://pkg.jenkins-ci.org/redhat/jenkins-ci.org.key
# yum install jenkins

....Lots of output .... 

Step 2) Verify Jenkins is installed and setup as a service.

# chkconfig --list jenkins
jenkins         0:off   1:off   2:off   3:on    4:off   5:on    6:off

# service jenkins
Usage: /etc/init.d/jenkins {start|stop|status|try-restart|restart|force-reload|reload|probe}

Step 3) Start Jenkins

service jenkins start
Starting Jenkins bash: /usr/bin/java: No such file or directory
                                                           [FAILED]

OOPS we didn't install java.
Lets see what's available

# yum list available | grep java.
.... Lots of output here ...

# yum  install java-1.7.0-openjdk 

....Lots more output here  ...

Lets check to see if we've actually installed Java

# java -version
java version "1.7.0_71"
OpenJDK Runtime Environment (rhel-2.5.3.1.el6-x86_64 u71-b14)
OpenJDK 64-Bit Server VM (build 24.65-b04, mixed mode)

Now lets start Jenkins

# service jenkins start
Starting Jenkins                                           [  OK  ]


Lets make sure Jenkins is up and running. Open a browser and navigate to your server, port 8080.

WooHoo We did it!!!


In PART 2 we will discuss setting up a server to host GIT.


Tuesday, November 25, 2014

hrsd.yahoo.com

I recently noticed almost all my Yahoo news links re-directed me to hrsd.yahoo.com. Frequently these links freeze and never load. So I finally decided to do some investigation. The only thing I found that seemed reasonable was the following partial explanation;


...the hsrd.yahoo.com referrer is similar to r.search.yahoo.com, which publishers will also see. It processes click actions for the home page. As part of our move to HTTPS secure search, referrer logs are now showing hsrd.yahoo.com when the source site was HTTPS-based.
So if you are seeing a huge change in referrer data from Yahoo, that is why....

-Pete

No Space Left on Device

Issue: No Space Left on Device

Discussion:
I have a server which has been setup to capture uploaded crash logs. Every hour I transfer these files (using rsync) to another server for statistical analysis.  One of our end users noticed that the current day statistics were not as expected.  I manually ran the script and noticed the No space left on device error below.  At first didn't understand how I could be out of space when a df -h returned 14 Gigabytes free.  After a reboot, and a little Googling I realized that the system was out of available Inodes.  

For those new to Linux an Inode is simply a pointer to a file, or more precisely pointer or index to a block on a disk which contains either part of or all of a file. In the old days a writable block on a system might be 512 Kb, now it is typical to have a block size of 4096 Kb or even 8192 Kb.  If a file doesn't fit into a single block then the next available block is written to and the system "magically" keeps track of the next block. On my system each of these crash logs was very small, and over the previous 6 months we had over 1.6 million uploaded to the server each file took up one Inode, and eventually I ran out of Inodes even though I didn't run out of diskspace.

rsync: mkstemp "/usr/local/crashlogs/20141120/.20112014135212_0.log.MdO3DE" failed: No space left on device (28)
rsync: mkstemp "/usr/local/crashlogs/20141120/.20112014135217_0.log.qz7uz4" failed: No space left on device (28)
rsync: mkstemp "/usr/local/crashlogs/20141120/.20112014135219_0.log.73mgvu" failed: No space left on device (28)


#df -h
Filesystem                   Size  Used Avail Use% Mounted on
/dev/mapper/vg_tern-lv_root   26G   11G   14G  45% /

The out of disk space error was related to the lack of available Inodes.

#df -ih
Filesystem                  Inodes IUsed IFree IUse% Mounted on
/dev/mapper/vg_tern-lv_root   1.6M  1.6M     1  100% /

Solution:
  There are some versions of Linux, and file system types that will allow one to increase the number of available Inodes. Mine was not one of them.  One option would be to back everything up reformat the disk with more Inodes then restore the system.  This was not an option for me.  The final solution is to remove unnecessary files.  Lucky for me the end user didn't care about old data thus she gave me permission to remove three months worth of crash logs. This freed up over 500,000 inodes.


IF you don't know the directory that is causing you issues below is a one line script that can help you find the location of your many small files.

for i in /*;do echo $i; find $i | wc -l; done